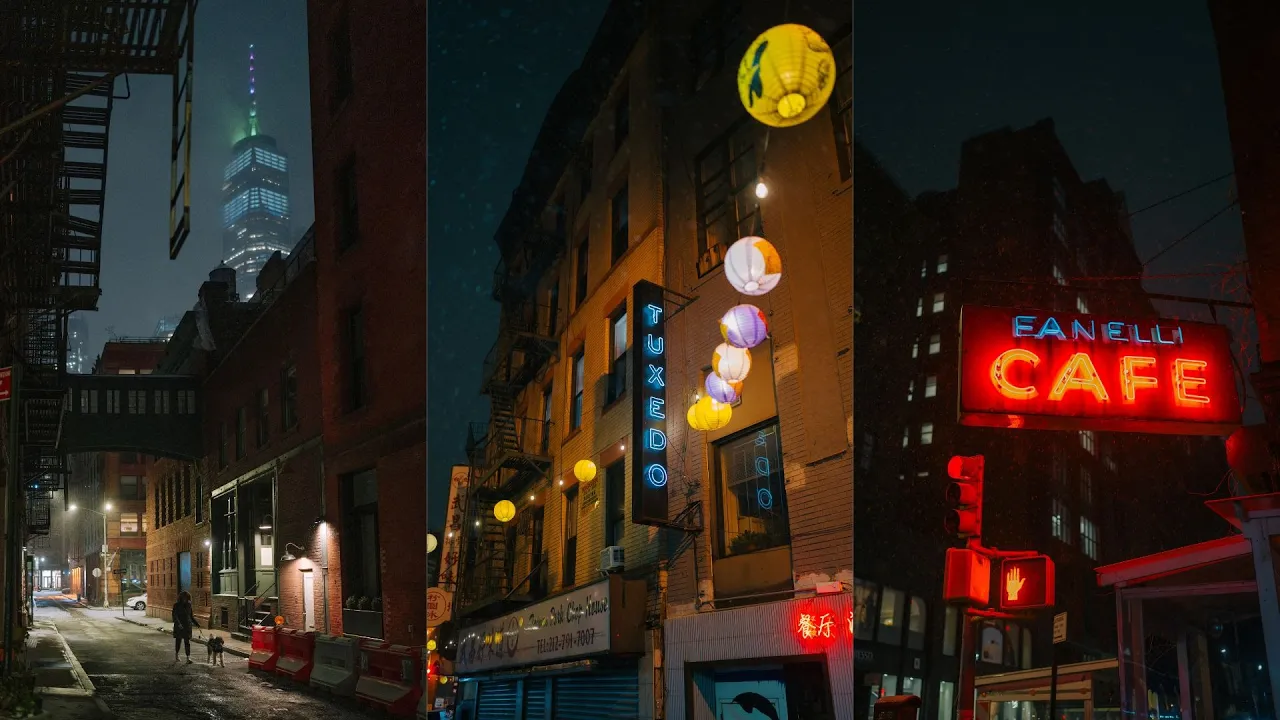
A Snowy Night of Street Photography in New York City (Night Photography Tips)
Photography Basics
It started snowing in New York City, so I went out at night to shoot Chinatown and Tribeca. Here are the photos, and the simple settings I use for night street photography.
·
6 min read

I'd been shooting pretty much all day in New York City, got home tired, and then it started to snow. I figured I had to go back out. It was a beautiful night for it.
So in this post, I'm walking around New York at night in the snow, starting in Chinatown, and sharing some tips for night street photography along the way. If you want to get into night photography but find it a little difficult to set up your camera, this one's for you.
READ OR WATCH: This blog post is also available in video form! If you'd rather watch me explain this content, simply watch the video below. Otherwise you can find the text guide below. Just keep scrolling!
In A Snowy Night of Street Photography in New York City, you can walk the streets with me from Chinatown to Tribeca.
What to look for at night: artificial light
Shooting at night is complicated, because there's no sun, which is usually our main light source. But it lets us shoot with artificial light, all the lights around us, and that creates a much different scene than we're used to. Light bends and shapes in all these different ways, coming from different sources and clashing into each other. Some colors really pop while others die off into the dark shadows. It creates some really interesting shooting opportunities.
So the first thing to look for is artificial light sources. That's exactly why I started in Chinatown, where they're absolutely everywhere: signs, lamp posts, storefronts. And the snow added a really dramatic element. I really liked the old storefronts, with the light falling off at the sides.

Expose for the highlights. When I'm shooting at night, I'm definitely exposing for the highlights. I don't mind my shadows being crushed into black. I just want to make sure the highlights are well exposed. I like it when the shadows slowly drift off into nothing at night. I think it looks really cool.
The curved street in Chinatown
There's a street in Chinatown that curves, and there aren't many streets in Manhattan that do. The whole city is built on a grid, but downtown there are a few. Apparently, there used to be gang wars here, and because the street curved, people could hide behind the bend. It was desolate that night, which was honestly really cool.
There was so much going on that I wanted to shoot it a few different ways, so I busted out the tripod to play with slow shutter speeds and small apertures: f/5.6, 1/8 of a second, ISO 500, with a 2-second timer. I also liked the lights hanging up top. When I find something cool, I usually spend a little time hanging out, evaluating it and looking for different angles.

Freeze the snow with a fast shutter speed
Then I found a Tuxedo sign that was really cool, and I shot it at f/1.4 with a faster shutter speed to capture the snow in motion. Because it's snowing everywhere, including right in front of the lens, the snow in the foreground goes beautifully blurry and out of focus at a wide aperture like f/1.4. It's probably one of my favorite photos of the night.

So I put the tripod away. Looking back, I liked the photos I shot at faster shutter speeds and wider apertures so much more than the slow shutter shots on the curved street, because the faster shutter froze the snow in the sky and really brought it out. (For when slow shutter is the right call, here's my guide to slow shutter speed photography.)
Wait for someone to walk into the light. At one point, I really wanted a person to walk into a pool of light. Someone came, then a couple walked through, and they came in clutch.

Tribeca at 11pm
Next, I walked over to Tribeca to shoot some different architecture. It was pretty quiet and dark, and by about 11pm I'd already had to raise my ISO quite a bit. One reason I went there was a really cool tower, and there's a sky bridge there too. Usually I wouldn't put the light source in my frame like this, but you can see the snow falling onto it, which looks really cool.

My favorite shot of the whole night was the sky bridge with the World Trade Center behind it and a woman walking her dog.

How to set your camera for night photography
Shooting at night is basically manual mode on hard mode. There's so little light that all your settings need to be balanced to capture the scene the way you want. You're pushing your camera to its limits. But it's not that hard once you grasp a few basic principles. Here's the order I set things in:
Aperture: open it as wide as you can. I was shooting a 35mm f/1.4, which is great at night because f/1.4 is a really wide opening that lets a lot of light into the lens. If your lens opens to f/4, use f/4. If it's f/2.8 or f/2, use that. A fast prime lens makes night photography so much easier, especially without a tripod. (Here's why I love the 35mm focal length.)
Shutter speed: decide about motion. The main question is whether you want to freeze motion or blur it. Faster shutter speeds freeze motion, slower ones blur it, and a tripod makes slow shutter much easier. If you're handheld, I wouldn't go below about 1/50 or 1/60 of a second, give or take. Some cameras with in-body stabilization can go slower.
ISO: raise it if you still need light. If it's still too dark, raise your ISO to 400, 800, 1600 or higher to balance the exposure. A lot of people are really hesitant to raise their ISO, as if noise is the worst thing in the world. I've shot at ISO 6400 and the images still cleaned up nicely, especially with Lightroom's AI Denoise. Image quality isn't the most important thing in photography. Capturing a mood, a vibe and a story is. So don't be afraid to raise your ISO.

Left: f/1.4, 1/100 sec, ISO 640. Right: f/1.4, 1/125 sec, ISO 1000.
Why bring a tripod anyway? I begrudgingly took one out that night, because I knew I'd want to shoot some scenes at f/5.6 or f/8, and there's no way to do that handheld at night. On a tripod, you can set your shutter speed to pretty much anything, 5, 10 or 20 seconds, and your photo will still be sharp. That flexibility is why tripods are, and forever will be, a necessary evil.
So, how do you get better at night street photography?
Look for artificial light, expose for the highlights, open up your aperture, choose your shutter speed based on whether you want to freeze or blur motion, and raise your ISO when you need to. Of course there's more complexity to it. You don't always have to shoot wide open at night. But that's the gist, and it'll give you the best results in low light.
The best way to get better is to just go shoot at night. It's fun, and I captured some really cool photos that night in New York. For the day trip I took with James Popsys to Coney Island that same winter, here's why creative limitations will make you a better photographer.
Which image was your favorite? Let me know in the comments on the video.
Happy shooting!
Want to master your camera settings? My Photography Essentials course breaks down aperture, shutter speed and ISO so you can nail your exposure in any light, day or night.


Sean Dalton
Made with ☕ and a camera.