Your Shutter Speed Is Too Fast (Slow Shutter Speed Photography Techniques)
Photography Basics
Shutter speed is just as much a creative tool as aperture. Here are five slow shutter speed techniques I use to add motion and story to my photos.
·
11 min read

One of the first things so many of us learn in photography is that our shutter speed shouldn't be too slow, otherwise our photos will be blurry. Shoot at 1/250th of a second or so, and your photos will be nice and sharp.
But shutter speed, just like aperture, is just as much a creative effect as it is a functional one. So why don't we play around with it a little? Used in the right scenario, slow shutter speed photography can introduce some beautiful motion blur that really helps enhance the story a photo is trying to tell. In this post, I'm breaking down the slow shutter techniques I use, so you can try them out too. Let's go!
READ OR WATCH: This blog post is also available in video form! If you'd rather watch me explain this content, simply watch the video below. Otherwise you can find the text guide below. Just keep scrolling!
In Your shutter speed is too fast, I show examples of every technique in this post.
What does shutter speed actually do?
Shutter speed is one of the three settings in the exposure triangle, along with aperture and ISO. It controls how long your camera's sensor is exposed to light. A slower shutter speed lets in more light and gives you a brighter image. A faster shutter speed lets in less light and gives you a darker image.

That part is pretty easy to understand. But the creative effect of shutter speed is its ability to freeze or blur motion. A fast shutter speed freezes motion in place. A slow shutter speed can introduce some really interesting motion blur, as long as your subject is moving fast enough through the frame.
(If you're still getting comfortable with the exposure triangle, you don't need to shoot in full manual to do any of this. Here's why you don't need to shoot in manual mode.)
Why use a slow shutter speed?
Motion blur opens up some really interesting opportunities creatively, and it can add so much to a photograph.

It shows movement and energy. Motion blur can express a sense of movement, dynamism or energy in a scene.
It makes a scene more abstract. It can make a scene look a lot more abstract and interesting, and it's great for capturing details when you're out shooting.
It feels more raw and organic. This is great for things like portrait photography. When I'm shooting portraits, I'm always trying to capture that raw, realistic vibe, and a slower shutter helps.
It feels moody and dreamlike. There's something almost dreamlike about slow shutter photography. Used in the right scenario, those photos can feel more emotional, and you can tell a much deeper story with a single photo or a series of photos.
So let's break down some slow shutter techniques you can try.
1. The tripod long exposure
I like to start with this one because it's very accessible, and a lot of us experiment with it when we're starting out, because it's fun and the images look cool.
A tripod completely removes camera shake. Your camera is locked down and not moving at all, so the parts of your scene that aren't moving stay nice and sharp, while the parts that are moving get some beautiful motion blur. And because your camera isn't moving, you can push this to the extreme: 5, 10 or 30 seconds, or even 5 to 10 minute exposures.
You just need to make sure the shutter speed you choose suits the speed of your subject. For example, I shot this photo with a 30-second exposure. I really wanted that motion blur in the water so it would look almost like glass, but the ocean wasn't moving all that quickly compared to something like a waterfall.

For this waterfall, I used a two-second exposure. Because the water was moving so quickly through the falls and down the stream, two seconds gave me just the right amount of motion blur. If I'd shot the ocean photo at two seconds, honestly it probably wouldn't have looked all that different, because the water was moving so much slower.

In a city, this will vary a lot. If you want light trails from cars, you might need a 5, 10 or 30 second exposure. But shutter speeds of around 1 to 2 seconds are really the sweet spot for a lot of urban photography. It creates this ghosting effect behind your subject and brings in a feeling of movement, without overdoing it to the point where there are no people left in the scene.

Bring an ND filter. The longer your shutter is open, the more light hits the sensor, and there may simply be too much light to realistically use a slow shutter speed. That's where an ND filter comes in. If you want to experiment with slow shutter speeds during the day, you definitely need one. I recommend variable ND filters. I carry a 2 to 5 stop variable ND and a 6 to 9 stop variable ND, so I can block incoming light and still use slower shutter speeds.
2. Handheld long exposures
There are a few different ways to shoot longer exposures handheld.
The first is to treat yourself like a tripod and hold the camera as steady as you can, maybe bracing yourself on something. That lets you do the same thing a tripod does: some parts of the photo sharp, and the moving parts blurred.
But you can take handheld long exposures much further than that, which is why I always recommend experimenting. Move with your subject, whip your camera from side to side, and try out different techniques. I really love doing this on portrait shoots, because it adds that raw, organic vibe.
Just keep in mind that the faster your subject is moving, the faster your shutter speed can be. It doesn't have to be super slow to capture motion blur. I shot this photo at 1/50th of a second, and that was slow enough because the model and I were both moving very quickly. I love how parts of the image are nice and blurry, while a little bit is still in sharp focus so you know what's going on.

You can get super creative here too. One thing I like to do is a hard pan from left to right, which creates some really abstract, interesting photos. On its own, a shot like that might not be the most interesting photo. But in a collection of images, like an album or an Instagram carousel, it helps tell a much deeper story about a place. It's a great chance to experiment with colors and shapes. Try spinning your camera, panning it, whatever. Just experiment.

3. The tracking shot
The tracking shot is when your subject is moving across your frame and you follow them as they move, keeping them in the same part of your composition. With a slow enough shutter speed, your subject comes out nice and sharp, and the background behind them is nice and blurry.
This looks absolutely epic, and I really like it because it keeps the focus on your main subject. You're turning the background into a jumble of shapes, colors and lights.
If you haven't shot like this before, it can be a little difficult to get right the first time. Here's what I'd do:
Use a shutter speed between about 1/10th and 1/70th of a second, depending on how fast your subject is moving through the frame.
Shoot with continuous autofocus, so your camera keeps focusing on your subject as they move.
Use a medium or high burst rate, so you take a bunch of images as they pass, and hopefully one turns out.
If your photos are too blurry, your shutter speed is probably a little too slow. If the background isn't blurry at all, drop your shutter speed down a bit more. It often takes a few attempts, so if you don't nail it the first time, just keep trying.

4. The double tracking shot
You can take the tracking shot one step further. I call this the double tracking shot (I don't know if that's what it's actually called, it's just how I understand it). It means you and your subject are moving together through space.
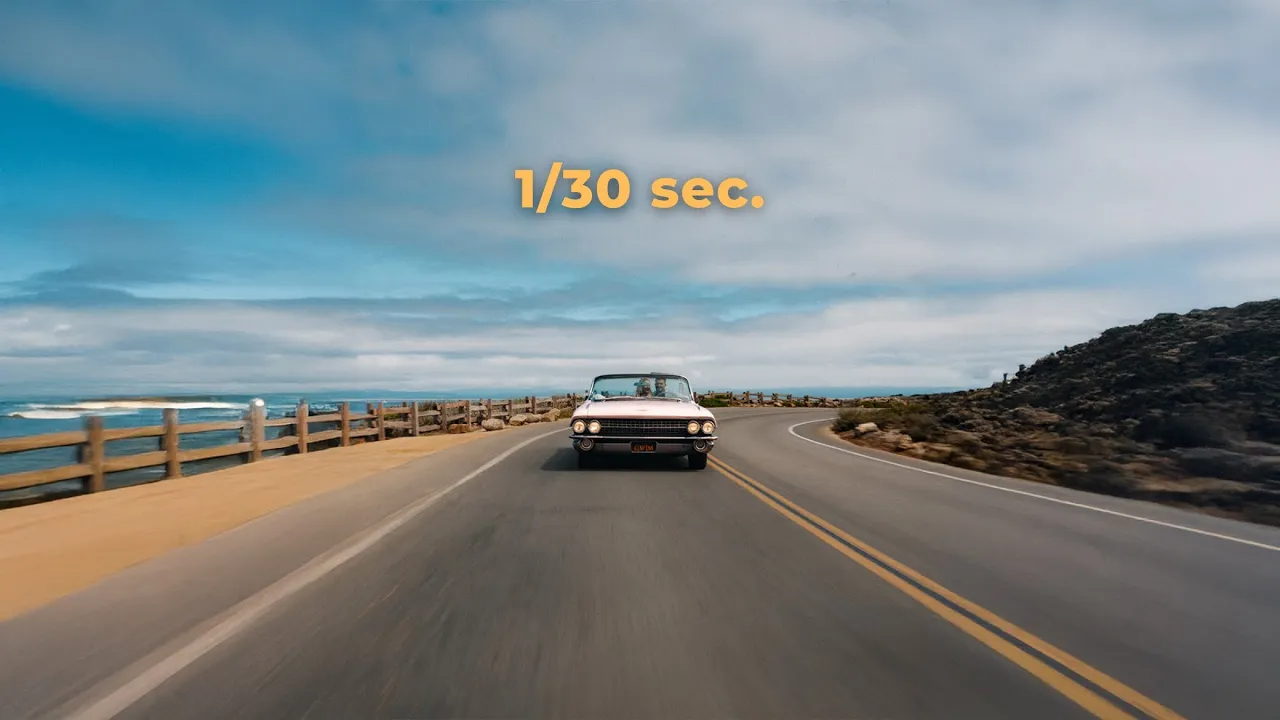
Picture yourself in the back of a car photographing someone on a motorcycle, both going 50 mph down the highway. If you shoot at 1/50th of a second, or even slower, your subject won't appear to be moving in your frame. They'll be nice and sharp, and the background will have this beautiful motion blur fading off into the distance. With a normal tracking shot, you can only really photograph your subject moving side to side. With a double tracking shot, you can capture them moving forward or backward too.
You'll see this most often in automotive photography. I shot this photo sitting on the back of a motorbike driving down the beach at 20 mph (which I definitely don't recommend, but the photo came out super cool).

One thing about this image: I wish I'd had an ND filter. I had to stop all the way down to f/16. I was already at ISO 100, and I couldn't use a slower shutter speed to get a bit more motion blur, which I really wish I could have. So once again, always carry an ND filter, because you never know when you'll need it.
5. The flash freeze
The last technique is the flash freeze. This involves using a flash on your camera, like the built-in flash on the Fuji X100VI. If it's dark and you're using a slow enough shutter speed, the flash freezes your subject in the frame, and then you can move your camera around to capture a bunch of light trails in the same image.
I tried this out at a party on January 1st, shooting the DJs, and it looks super cool. After the flash freezes your subject, you spin your camera or move it around, and you get this really cool slow shutter effect.

Ideally, your subject should be relatively dark before the flash hits them, and you want some practical lights in the background to play with as you move the camera. In terms of shutter speed, I think 1 to 2 seconds is the sweet spot for this type of photo.
There are plenty of other techniques too. If you have a zoom lens, for example, you can zoom in or out really quickly during the exposure to capture motion blur that way.
Tips for better slow shutter photography
Use it sparingly. Slow shutter won't work with every image. It's just another tool in your tool belt, so use it in the scenarios where it will actually add something to your scene. Don't do it because you think it'll look cool. Do it because it enhances the story in that image.
Make small changes. Often, a subtle change gets you the shot you want, and you probably won't nail it on the first try. Drop your shutter speed in small increments, check your photos, and adjust from there.
More motion blur isn't always better. I was shooting on a snowy night in New York City (you can watch the full night of shooting here), and I first took this photo at 1/15th of a second. You can hardly see the snow, because it was moving quite quickly and my shutter speed was too slow, so it blurred the snow almost completely out of the image. At 1/50th of a second, I got a little motion blur in the snow while still freezing it enough that you can actually see it. That adds so much to this image. Without the snow, I think it would be a much less powerful photo.

So, is your shutter speed too fast?
Maybe! Fast shutter speeds keep things sharp, but slow shutter speed photography gives you a whole new set of creative tools: tripod long exposures, handheld blur, tracking shots, double tracking shots and the flash freeze. Pick the right one for the scene, use it sparingly, and adjust in small steps until the motion blur tells the story you want.
I'm sure there are plenty of techniques I missed. If you have one, let me know in the comments on the video, because I'd love to try it out. And if you want to keep going, here's how to take photos that make you feel something.
Happy shooting!
Want a solid foundation in the basics? My Photography Essentials course covers shutter speed, aperture, ISO and everything else you need to get comfortable with your camera, so it stops getting in the way of your creative vision.


Sean Dalton
Made with ☕ and a camera.