How to Edit Photos in Lightroom With Intention (My 5-Step Editing Workflow)
Lightroom
Most photographers wing their edits. Here's how to edit photos in Lightroom with intention, using the five-step workflow I teach in my Lightroom Masterclass.
·
12 min read

Editing is a massively important part of the photography process, but most photographers kind of just wing it. They open up an image, slap on a preset, move a few sliders around, and call it a day. Sometimes that works and you end up with a great edit. But a lot of the time you end up with something that feels a little off, and you're not really sure how to fix it.
I edited like this for years and cycled through so many different styles along the way, some good and some not so good. But all of that trial and error led me to what I like to call editing fluency. So in this post, I'm showing you exactly how to edit photos in Lightroom with intention, instead of guessing your way through every edit. Let's go!
READ OR WATCH: This blog post is also available in video form! If you'd rather watch me explain this content, simply watch the video below. Otherwise you can find the text guide below. Just keep scrolling!
In This Lightroom Trick Makes Editing EFFORTLESS, I edit a surf photo from start to finish in Lightroom using this exact process.
What is editing fluency?
Editing fluency is being able to open up an image, know the exact direction you want to take the edit, and then execute that edit with confidence instead of guessing your way through it. You're not just moving sliders until something looks okay. You know what you're going for and which adjustments will get you there.

That doesn't happen overnight. But there's a way to approach your editing that's much more effective than guessing, and it starts before you touch a single slider.
Start every edit by asking how the photo should feel
Let's start at the very beginning of the editing process. You upload your photos, open one up in your editing software (Lightroom, Capture One, whatever it is), and you sit there staring at it. What do I do first? Where am I supposed to start? What style should I edit this in? I definitely remember feeling like this in the beginning.
So before I make any adjustments, I ask myself one simple question: how do I want this photo to feel? What emotions do you want to convey? Or how do you remember feeling when you shot it? Just thinking about this at the start can give you a ton of clarity on the direction you want to take the edit and the style you want to edit it in.
Nostalgic. Here's a photo I shot in California last year. I'm inspired by a lot of film photographers in California, so whenever I go there, I'm really drawn to that nostalgic, grainy, washed-out film look. That's the direction I took with this edit: lower contrast, deep blacks, soft whites and highlights, and a little warmth in the sky to give it that nostalgic feeling.

Old school color. This one was also shot in California. It's a cool scene, but I really wanted to enhance the colors and give it an old school, nostalgic vibe. I brought out the blues, added a little warmth, and made the greens a little more blue and less yellow, if that makes sense.

Epic. Sometimes I want to pursue a completely different style based on how I felt when I shot the image. This photo was also shot in California, but when I see it, I don't think nostalgic film vibe. I think something epic and grand. So that's what I leaned into: more contrast, brighter highlights, and a ton of warmth to give the photo character and make it stand out.

Happy. This last one is also from California, and it was actually an engagement shoot. Everyone was happy and the vibes were good, so I wanted to lean into that and make the image nice and bright, nice and saturated. Those emotions really fit the scene, and I wanted the final edit to embody them.

I thought about all of these things before I actually started editing. I knew which direction I wanted to take each edit because I knew the emotions I wanted the final photo to hit. I know it sounds basic, but this is one of the most foundational principles of editing. If you have that intention going in, you're not just sitting there guessing and experimenting. You're editing with intention, because you know exactly the look you're going for.
My 5-step Lightroom editing workflow
Once you've set your intention, it's time to actually start editing. But once again, where are you supposed to start?
What I like to do is break my image down into a few categories and edit through them step by step. Not only does this give you a ton more structure, it also helps you understand the digital anatomy of a photo, so you can break it down into pieces instead of looking at it as a whole. And it makes sure you're hitting all the most important adjustments. The five steps are:
Prepping the image
Editing light
Editing color
Editing detail and effects
Fine-tuning the edit
This is the exact same structure I teach in my Lightroom Masterclass. I won't go super in depth on every tool here, but I do want to show you how it works on a real image.
This is a photo I shot off the coast of France, and as you can see, the surf was absolutely pumping that day. I was super far away, shooting at 500mm. When I look at this image, the only thing I think is: this is epic. This dude is wiping out, he's in the air, and it looks super cool. But he's way too far away, the composition is super wonky, and we definitely need to make some changes.

Step 1: Prep the image. When I say prepping the image, all I really mean is cropping and removing any distracting elements. I cropped this one to 4x5, zoomed in and made sure our surfer is front and center. Then I checked for anything distracting to remove. If there was something, I'd use the Remove tool, but there's nothing I want to take out of this one.
Step 2: Edit the light. Light means exposure (the brightness of the image) and contrast (the difference between the bright and dark areas). Most of your light adjustments happen in the Basic panel and the Tone Curve. But before making any, I reflect on my intention again. I want this image to be really bold, epic and dramatic, so I'm going for a higher contrast look. I brought the Blacks way down and the Whites up a little to enhance the contrast, then brought the Highlights down a little to keep plenty of dynamic range, and the Shadows down a touch too. In the Tone Curve, I made a basic S-curve: shadows down, midtones left where they are, highlights up. That adds a ton of contrast, and it's already looking really nice.

Step 3: Edit the color. There are a few different ways to edit color in Lightroom. You can make the white balance warmer or cooler. The HSL sliders (hue, saturation and luminance) let you adjust the colors already in the image. The Color Grading panel lets you add color into the highlights, midtones and shadows. And Calibration affects the primary colors of the image (red, green and blue). I always start with white balance. I wanted bold, dramatic colors, so I tried adding warmth, but it was doing some weird stuff to the water, so I left it alone. Instead, I went to Color Grading and added warmth to the midtones and highlights, plus some blue in the shadows to complement those colors (dragging that down darkens the shadows a little too, which I like). In the Color Mixer, I pushed the oranges and yellows a little more red, bumped the orange saturation to make the colors really bold, and desaturated the greens a bit. That definitely fits the color vibe I'm after.
Step 4: Edit detail and effects. This covers sharpening, noise reduction, grain and effects like a vignette. This image is sharp enough, so I didn't add any sharpening or noise reduction. I also skipped grain, because it doesn't fit the vibe here (though it's something I add to a lot of my images). But I did add a little vignette. Even -3 keeps the focus on our main subject in the middle.
Step 5: Fine-tune the edit. This is where the masking tools come in, and there are so many cool things you can do with them: linear gradients, radial gradients, and even automatic subject selection, which Lightroom is very good at. I added a linear gradient over the bottom of the photo to darken it up a little, then another over the top where I experimented with more saturation, brighter highlights, and a bit of Dehaze to bring the background through. (If you want to go deeper on this step, here's the Lightroom masking trick pros use on every edit.)

And that's probably all I would do to this image. It definitely hits the intention I set: I wanted it bold, grand and epic, and every single adjustment I made was with that in mind. By following this five-step process, I made sure I touched on all the most important adjustments. So if you ever feel lost on where to start an edit, I think this process can give you a ton of clarity and structure.
How do you know when an edit is finished?
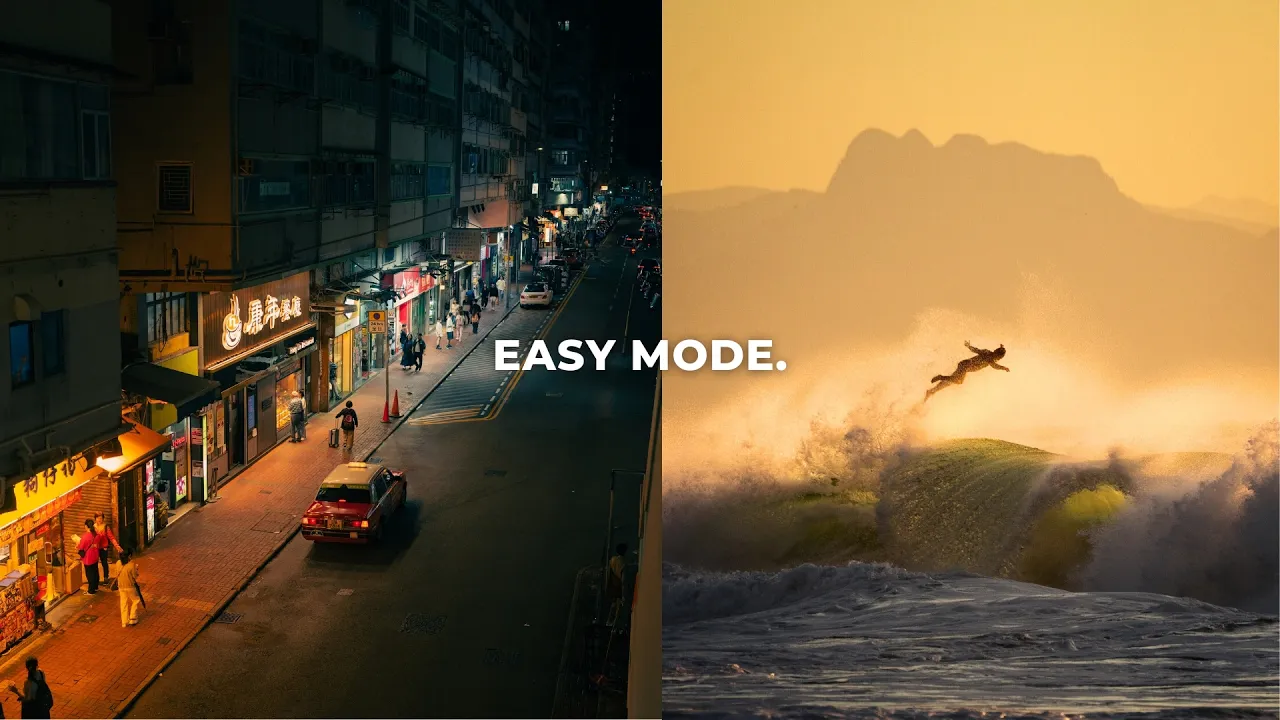
Some images are super easy. You pop them into Lightroom, throw on a preset, and they look good straight out of the gate. For example, this is a photo I shot in Hong Kong recently. I love this image. Basically all I did was apply my Grainy Japan preset, crop it and remove a few things, and it was pretty much done.

But not every image is like that. Sometimes you'll sit there for 30 minutes or an hour fiddling with all these settings, and you're just not sure if it's ready to go. Here are three things I do to check.
Step away from the image. After staring at an image for a long time, our eyes get used to the changes, and we can miss something that looks a little awkward. This is especially true with color. We get color fatigue, our eyes get tired, and we stop picking up on things like a tint that's a little off or a white balance that's a little funky. Taking a break helps you see the image in a new light, and sometimes when you come back you'll know immediately whether it's ready.
Go back to your intention. Remember how you wanted the photo to feel. Look at your edit and ask yourself: is it conveying those emotions? Or is it at least getting close? If so, that image is probably ready to go.
Send it to another photographer. I've talked about this in so many of my videos. Send it to a photographer or another artist who has a good eye for color, composition and light, and ask their opinion. Sometimes you're spending all this time trying to fix something that isn't broken.
Approach each photo independently
Up until this point we've talked about editing workflow and how to think your way through an edit. Now I want to cover a couple of broader editing tips that massively helped me in the beginning.
The first is to approach each photo independently. So many of us photographers want to develop a signature style that's unique and stands out. A lot of that comes down to how you shoot, but a huge part of it is the edit too. And one of the biggest mistakes I see (I made it early on as well) is trying to force a stylized edit onto a photo it just doesn't match.
Say you were shooting in Europe and you nailed the European edit. You've got the warm highlights, everything looks really vibey. Then you go on a trip to Bali, and all of a sudden you're dealing with intense greens you didn't have in Europe. If you take that exact same edit and apply it to the Bali photo, it's probably not going to look very good. Forcing a style onto a photo is how edits really fall apart.
Now you might be thinking, "Okay Sean, then how am I supposed to have a signature style?" You don't need to copy every stylistic element from one edit to another. If just a few of them line up across your entire body of work, that's your style. Some of the characteristics of mine are darker, moodier images, a lot of saturation, and leaning into one dominant color, often really warming up or cooling down an image. That's why photos I shot in Bali still look good next to photos I shot in Europe.

I know it can be difficult in the beginning when you're trying to develop that style. But forcing an edit on an image where it doesn't belong is one of the quickest ways to ruin a photo. So take each photo independently, and over time your style will develop naturally. (I go deeper on this in how to find your photography style.)
Experiment like crazy with your edits
At the start of this post, I talked about how important it is to approach an edit with intention. But I also recognize that if you're just starting out, you might not know which direction to take an edit, because you're not experienced enough yet. That's why my last tip is to experiment like crazy.
Take one photo and edit it in five or 10 completely different styles, then choose your favorite at the end. The key, once again, is to experiment with intention. You're not just throwing on adjustments and guessing how they look. You're paying very close attention to each adjustment and evaluating how it affects every aspect of the image. How is it affecting the mood or story of the photo? How is it affecting your other adjustments? What happens if you stack it with another one?

I think experimenting with edits and playing around with all the different sliders is the single best way to learn how to edit photos. Yes, YouTube videos and posts like this can give you structure and teach you how the tools work. But that deeper understanding, and really mastering the software, comes from experimentation.
There's no correct way to edit an image. There are so many ways to use these programs, and the only thing that really matters is the end result. You might find you vibe with one adjustment over another, so just play around and get to know the software through and through. I spent hours and hours editing horrible looking photos when I started out, but all that trial and error taught me so much and led me to editing fluency today.
So, how do you edit photos in Lightroom with intention?
As you can see, it's not just "slide these sliders and make these adjustments." It's a lot deeper than that. Set your intention, work through the image step by step, check your edit with fresh eyes, treat every photo on its own terms, and experiment like crazy. If you want to keep going with color specifically, check out the trick to perfect color grades in Lightroom.
Best of luck and happy editing!
Want to learn my full editing process? My Lightroom Masterclass has over five hours of super detailed editing lessons, breaking down not only how to use every single slider in Lightroom, but why you'd make each adjustment to your photos.


Sean Dalton
Made with ☕ and a camera.