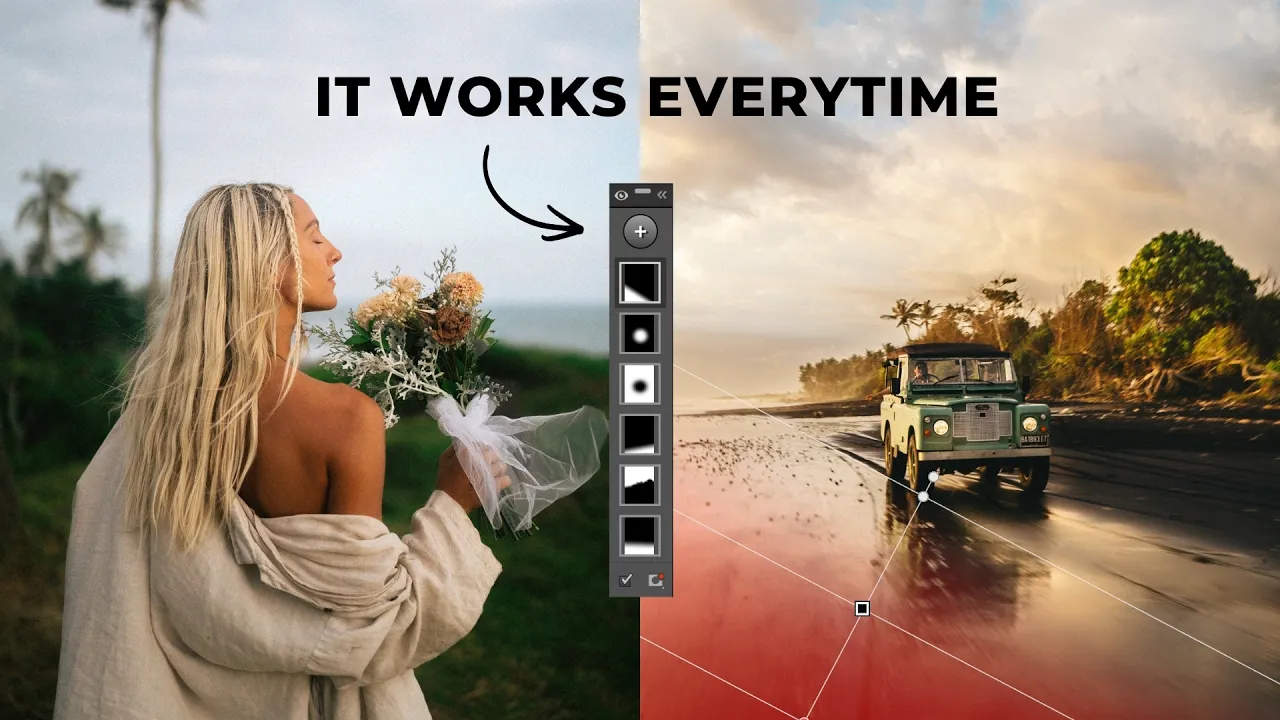
The Lightroom Masking Trick Pros Use on Every Edit
Lightroom
Lightroom's most powerful tool, made simple.
·
8 min read

Have you ever looked at one of your favorite photographers' edits and wondered, "Dang, how did they do that?" I can almost guarantee you they're taking full advantage of Lightroom's most powerful tool: the Lightroom masking tools. They also happen to be the most underused tools in Lightroom.
In this post, we're going to change that. I'm going to make the masking tools incredibly easy to understand, show you some real-life use cases you can use on your own photos, and share a secret masking trick with you at the end.
READ OR WATCH: This blog post is also available in video form! If you'd rather watch me explain this content, simply watch the video below. Otherwise you can find the text guide below. Just keep scrolling!
In The Lightroom Masking Trick Pros Use on Every Edit, you can watch me make every one of these masks on my own photos.
What are the masking tools in Lightroom?
The masking tools let you select a very specific part of your image and edit it independently of the rest of the photo. A normal adjustment in Lightroom affects your entire image, which sometimes works, but often doesn't look good in certain parts of the photo. Masks let you hone in on those parts and fine-tune them to perfection.
To open the masking dashboard, click the little circle icon at the top of the right-hand panel in Lightroom. All of the buttons in that module are just different ways to make a selection on your photo, and they fall into two categories.
AI selections. Lightroom looks at your image, detects what's in it and makes the selection for you, which is super great to have. One I use a lot is Subject: click it and Lightroom creates a mask over your subject. Once you have a mask, click the plus sign to add another one, like Sky (Lightroom finds the sky in your photo), Background, People (it finds every person in the photo), or Landscape, which breaks your image down into pieces like sky, vegetation, water and natural ground. It isn't perfect, and Lightroom doesn't always do the best job with these selections, but it often gives you a really fantastic place to start.

Manual selections. If you click the plus sign again, you'll also see the manual tools:
Brush: paint over the part of the image you want to edit.
Linear Gradient: drag it over your image and the effect is stronger at one end and weaker at the other. Run it across the whole image, or keep it small to only affect a corner.
Radial Gradient: a circle you can stretch and resize. Really great for circular objects, or for affecting one small part of the frame.
Color Range: click a color with the dropper (say, a green) and Lightroom selects all the greens in the image. Click and drag to widen the selection, then refine it in the top right corner.
Luminance Range: works the same way, but selects everything that shares the brightness level of where you clicked.
You can also subtract from a mask (click the mask, hit Subtract, then use any of these tools to paint out what you don't want), or add to it with the plus sign. If this all sounds a little confusing, don't worry at all. Here's how these tools actually work in practice.
Technique 1: Shape the light
The first thing you can do with masks is shape the light in your scene. Darken certain parts of your photo and brighten others to guide the eye around the composition, keep the focus on your main subject and add a ton of depth through light.
This is a photo I shot in the foggy forest of Madeira, Portugal (such a cool place). I wanted to capture that foggy, moody vibe, and I think the edit did a pretty good job. But we can really spice it up by shaping the light and honing in on that moody look:
Drag a linear gradient down from the top of the frame and bring the exposure down a little to darken the top of the photo. Already, that pulls your eye down toward the part of the image we care about.
Add another linear gradient up from the bottom and darken that a little too. Toggle the masks on and off with the eye icon, and you'll see your eye naturally gravitating toward the middle, because the top and bottom are darker.
To make sure people look right into that middle area, brighten it. Add a luminance range mask and click the bright area behind the subject. It does a pretty good job, but it also selects the top of the frame, which I don't want brighter.
This is where the intersect mask comes in. Right click the mask, choose Intersect Mask With, pick Radial Gradient, and drag a big radial gradient over that middle part of the image. Now the adjustment only affects the area where both masks overlap: the bright parts, inside the circle.
Bring the exposure up. Only the middle of the image gets brighter. The top, the bottom and the dark areas aren't touched.
That looks really, really good. The middle of the image (where the subject is) is highlighted, and the parts that aren't as important are a little more subdued, so the eye naturally goes right where you want it.

Technique 2: Shape the texture
Another amazing use for masks is very similar, but instead of shaping light, you're shaping texture. You use clarity, texture and dehaze to emphasize and de-emphasize certain parts of your image. This is a photo I shot on the beach here in Bali, one of my favorite photos of all time. The edit already looks amazing, but I know for a fact we can take it to the next level:
Click Subject. Lightroom's selection wasn't amazing, but that's okay. Click the minus sign, choose the Brush, use the bracket keys to make it smaller, and roughly paint out the areas you don't want selected. (Quick tip: press O on your keyboard to show or hide the mask while you work.)
Bring the exposure up a little to add more light to the subject, then raise clarity to around +15, plus a touch of texture and a little dehaze to add some contrast to the subject.
Right click that mask and choose Duplicate and Invert Mask. Now everything except your subject is selected, which is incredibly useful. Pull clarity down a little, and your subject becomes even more prominent because the background is less prominent.
Add a Sky mask and raise clarity (I went to around +23) and dehaze. That brings so much more detail, texture and interest into the sky.
Add a Landscape mask, choose Vegetation, and add a little haze to the area behind your subject. It's very subtle, but it really helps separate the subject from the background.
Finally, shape the light: a radial gradient angled where the sun is, with the exposure up to emphasize the diagonal light coming from the left of the frame, and a linear gradient to darken the bottom a little.
Toggle the masks on and off, and you'll see how much visual interest it adds. We've sharpened up the subject, toned down the background, added a ton of interest to the sky, and shaped the light to guide your eye onto the main subject. (There's one last thing I'd do to this photo, and I'll show you that in the bonus at the end.)

Technique 3: Shape the color
We can do so much more with masks than edit light and texture. We can also edit color, and this is where things really start to get interesting.
Morro Bay, California at blue hour. I love this photo, and I think the edit captured that moody, beachy California vibe, but the colors were really lacking. I dragged a linear gradient over the sandy part of the beach and pushed the temperature warmer. The sand would naturally be a warmer tone anyway, so adding warmth really emphasizes the color there. Then I added a Sky mask, pulled the temperature cooler for a deeper blue, and played with tint to dial in the exact shade. With just those two adjustments, I added so much color. I love using the temperature sliders for this because cooler tones in one part of an image and warmer tones in another are complementary colors (blue and orange), which creates a lot of color harmony, looks great, and can really enhance the story of your photo.
A drone shot of a village in Tuscany. Same idea, more masks: a linear gradient over the buildings in the foreground with some added warmth, a Landscape mask on the vegetation with the tint pulled toward green (and a touch warmer to dial in that exact shade), a Sky mask nudged a little more blue with the highlights down, an Architecture mask with more warmth and a bit of saturation, and a linear gradient to darken the bottom and keep the focus on the village. With just a few changes to temperature and tint, there's so much more color interest. You can always use Point Color too, but changing the temperature of a color can really change its overall hue and vibe.

Skin tones. Color masks are also incredibly useful for skin. In this photo of my friend Kelsey in Bali, her skin was way too saturated. I used a color range mask and clicked on her skin, then right clicked the mask and intersected it with Subject so it only affects her. Then I toned down the saturation a little and made the temperature a little cooler. In two clicks, the skin tones look much better. It's such a small change, but that's often how skin is: you really don't have to make big changes to dial it in.

If you want to go deeper on color, check out the trick to perfect color grades in Lightroom and my video on color theory.
Bonus: Turn on the lights
I promised we'd come back to that Bali beach photo, because there's one trick that will really take it to the next level: turning on the car's headlights with masks.
Add a radial gradient and zoom in (I went to about 300%). Drag it over one headlight, and bring the feather way down (around 18).
Right click the adjustment and duplicate it, so both masks sit under the same adjustment, then drag the copy over the other headlight.
Jack the exposure up pretty high, and pull the temperature warmer. Experiment with adding a bit more feather until it looks right.

Honestly, that looks pretty realistic. I've posted this photo before, and nobody has picked up on the fact that those lights weren't actually on! To take it even further, add another radial gradient lined up with where the headlights are pointing, with a little exposure and warmth to paint the light in, and maybe another one to darken the area around it.

I love doing things like this, and I've done it in several other images to add a ton more visual interest. Every photo is a little different, and sometimes you might end up with 50 different masks. That's okay, as long as you're getting the look you want.
So, are the Lightroom masking tools worth learning?
100%. When I learned how to mask my images, my edits got so much better, because you have so much more control over a photo when you can pick it apart and edit very specific parts of it. And a lot of the changes I made here were actually quite subtle. Subtle changes make a big difference when you stack multiple adjustments together in one photo.
So when you finish your global adjustments, look at your photo and ask yourself: are there any parts of this image I want to enhance and make more prominent? And are there any parts that are a little distracting? Can I tone them down, add some haze, reduce the clarity or darken them to guide the eye onto the main subject? Asking yourself these questions gives you a lot of clarity on what adjustments your photo actually needs.
If you can grasp the concepts in this post, that's pretty much all you need to know to create some really exceptional edits in Lightroom. Best of luck and happy editing!
Want to see my full editing process? My Lightroom Masterclass has over five hours of super detailed editing lessons, masking included.


Sean Dalton
Made with ☕ and a camera.