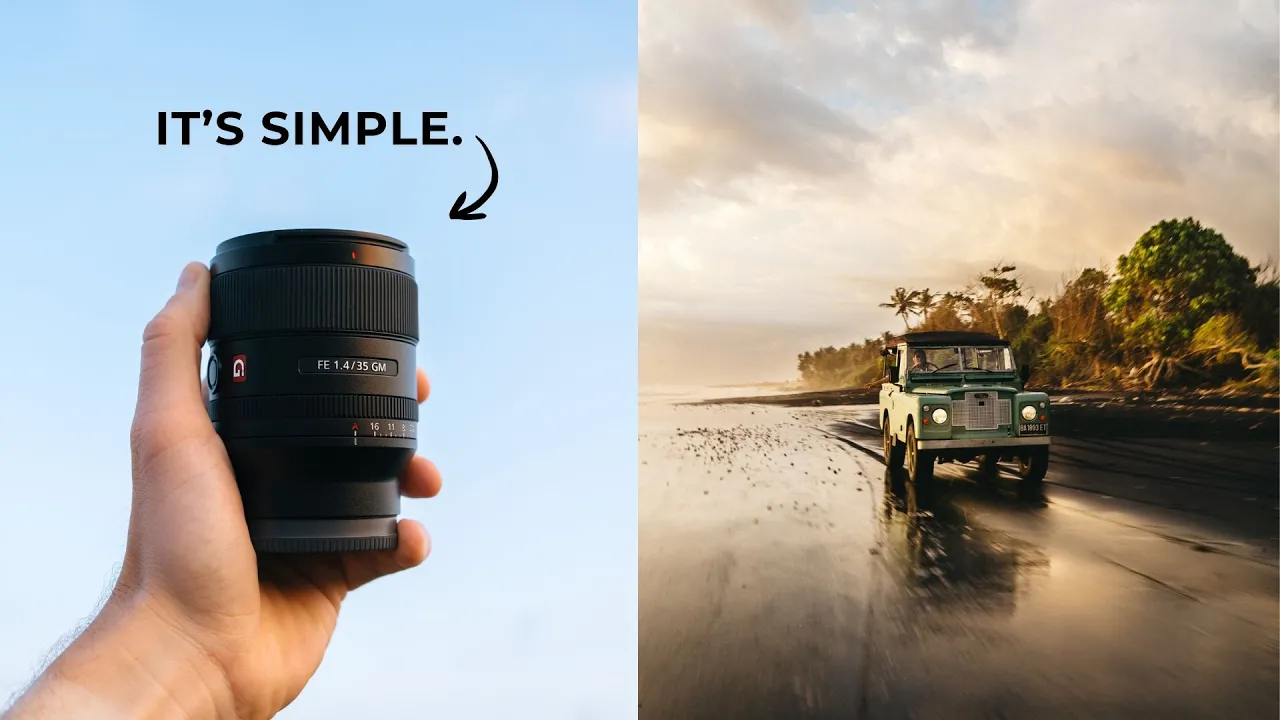
How to Shoot With a 35mm Lens
Travel
Photography Basics
Gear
My favorite focal length, and the tips I follow every time I shoot with it.
·
10 min read

35mm is, in my personal opinion, one of the best focal lengths out there. But learning how to shoot with a 35mm lens can be a little difficult when you first pick one up. Composition gets more difficult the wider you shoot, and you can't completely blow out the background like you can with a 50 or an 85mm lens.
After shooting literally hundreds of thousands of images on a 35mm lens over the last 8 years or so, I think there's a specific quality it brings to your images that no other focal length can match. So in this post, I'm doing a deep dive into how to shoot with one, so you can master it too. Let's go!
READ OR WATCH: This blog post is also available in video form! If you'd rather watch me explain this content, simply watch the video below. Otherwise you can find the text guide below. Just keep scrolling!
In How to Shoot with a 35mm Lens, I break down why I love this focal length and walk through every tip with my own photos.
Why is 35mm such a great focal length?
A 35mm lens sits right in the sweet spot between wide and zoomed in. It's wide enough to show the scene around your subject and tell a more meaningful story, but not so wide that you get a ton of distortion or a frame that's way too busy. That's what makes it so versatile, and so good for storytelling.
It's the sweet spot. Personally, I'm into cleaner compositions. I like having a very clear subject, and I like my photos to be easy to look at. I find that really difficult to do wider than 35mm, because there are just so many things in your scene to account for, and your photo can get busy very quickly. (If you've seen my video on 24mm, you'll know exactly why I don't like shooting with that lens.)
It's incredibly versatile. Because 35mm sits right between a wide angle lens and a more zoomed in lens, I can shoot absolutely anything on it: portraits, landscapes, street, documentary, still life, automotive, commercial, or just documenting my everyday life. The 35 is almost always the first lens I pick up, in pretty much any photography scenario.

It's one of the best focal lengths for storytelling. And storytelling is ultimately the most important thing in photography. 35mm drops you into the action of a scene. Where lenses like a 50 or an 85 can feel distant, safe or controlled, a 35 makes you feel like you're actually there in the scene, engaging with it. It's very close to what we actually see with the human eye, which makes images shot at 35mm feel incredibly natural and immersive.
It truly is a beautiful focal length. If you can learn how to use it, you can shoot pretty much anything with it, and I think you'll fall in love with it once you do. So with that said, here's how to shoot with a 35mm lens.
1. Use it to include context
One of the most beautiful things about a 35mm focal length is that it shows the scene around your subject, and that enhances the story of your subject.
If you go out with a 35 and try to shoot it like a 50 or an 85, opening the aperture all the way to f/1.8 or f/1.4 to obliterate the background behind your subject, you're going to find that a lot more difficult. But that's not where the 35 shines anyway. It shines because it shows the scene.
So when you're shooting with a 35, pay very close attention to all the different elements in your scene, and ask yourself: would including these elements enhance the story of my photo? Or are they actually distracting from it, in which case I should do my best to exclude them from the final shot?
This portrait I shot in Bali (on a 35, of course) is one of my favorite portraits of all time. The subject is super interesting, I love that we can see his motorcycle, and I like his pose. But the scene around him also tells a really interesting story about where he is, and it grounds the shot in a meaningful setting. We can see the house he lives in, the Balinese temple in the back, the TV and the artwork, and these beautiful light rays spilling in. I could have put on a 50 or an 85 and shot his portrait up close, but this image is a million times more interesting than a close-up of his face.

Another example is this portrait of Margaret, a goldsmith in Zurich, which I shot during a project with the Swiss Tourism Board. Like the last photo, the 35 really opens up the scene and gives so much context about who she is. We can see her machines in the back, some of her work in the foreground, and the light spilling in from the left side of the frame. Including all of these contextual elements around her adds so much interest, and it tells a much more meaningful story.

2. Use negative space and framing to simplify
Including context is a bit of a double-edged sword, though. Yes, a wider focal length means you can include more things that enhance the story of your photo. But it also means you have a lot more compositional elements to pay attention to. Your shots can get very busy very quickly, and it's harder to isolate your subject like you can with a 50 or an 85. That's why the next tip is to use negative space and framing to simplify your composition and isolate your subject.
Negative space is empty space around your subject that almost helps it breathe in the composition. It simplifies the frame and makes it very easy for the viewer to know exactly where to look. I use negative space all the time to make my photos a little easier to look at and digest. In a lot of my images I use the sky, but you can find negative space in buildings, on the ground, pretty much anywhere. You just have to look for it.

Framing is the other way I like to isolate my subjects. Because you have a wider field of view with a 35, there are a lot more elements you can play with compositionally, and so many things you can use to frame your subject. I've done it with trees and plants, with buildings, with strong directional light (which makes an amazing frame), and I've even used other people to frame my main subject.


It's not always easy to get clean compositions with a 35mm lens. But as someone who really likes clean and simple compositions, I can tell you it's definitely possible if you use negative space and framing. (I go deeper on both in how to improve your composition.)
3. Use foreground elements to add depth
One of the things you might notice when you first pick up a 35 is that your images look a little flat. That's because you don't get the same shallow depth of field you get with a more zoomed in lens. But it's actually really easy to introduce depth with a 35: step behind something and use foreground elements in your scene.
I do this all the time, because I really like having a deep sense of depth in my photos. I like to open my aperture up to f/1.8 or f/1.4 and shoot through something onto my subject, so there are nice out of focus areas in the foreground. That adds so much depth, and (tying into the last tip) those foreground elements can also introduce negative space or help frame your subject. Because 35mm is so wide, it's really easy to find something to shoot behind.
I shot this photo on the ferry in New York City, and I absolutely love it. But it would be so incredibly boring without the foreground. We can see part of the boat, part of a person and the life ring, which add so much depth and so much interest to the scene.

This one from Morro Bay is probably one of my favorite images I shot all last year, partly because of the foreground element that adds visual interest and depth. It would be a lot less interesting if it were just the birds in the sky. So next time your images are looking a little flat, look for things around you to shoot behind.

4. Unfocus your eyes
Another technique that was super helpful when I first started shooting with a 35 is to unfocus your eyes. (Apparently some of you don't know how to do this!) Basically, I look a little cross-eyed so the scene in front of me goes nice and blurry.
When you unfocus your eyes like this, the scene breaks down into a bunch of shapes of light, color and geometry. That makes it a lot easier to pick up on the more dominant features of the composition, and then you can compose based on that. I find this incredibly useful, especially with wider focal lengths like 35mm.

5. Get closer than you think
This is something I really struggled with when I bought my very first 35. It's considered a wide angle lens, and you can't just sit across the street, photograph a subject and expect that photo to be interesting. You've got to get in there.
Sometimes this is really easy. If you're shooting portraits of a friend, it's not hard to get a little closer and capture a more intimate photo. But with something like street photography, it can get very uncomfortable very quickly. Still, if you can get close to your subject, that's where your images are really going to shine.
Compare street photography shot on a telephoto lens with street photography shot on a 35. With the telephoto, you feel so distant from your subject, like an outsider observing that person or scene from far away. With a 35, you feel like you're actually there, existing in the scene, and it feels so much more real.

It might be uncomfortable at first. It definitely was for me, walking up to people on the street and having a camera very close to them. But you do get more comfortable over time, and it makes a massive difference in capturing more intimate photos.
6. Move your feet and work the scene
When you first pick up a prime lens, you probably hear the idea of "zoom with your feet." Because a prime can't zoom in or out like a zoom lens, you have to physically move closer or farther away. But I find that idea way too one-dimensional, because there are so many other perspectives you can get with a prime lens than just zooming in or out.
One of the best things you can do with a 35 is really work the scene in front of you. At 35mm, distance changes the look of your photo a lot, and stepping back even a few steps can give you a completely different image.
Toward the end of last year in Bangkok, I came across some little boys fishing in the river. They were stoked to see me, I was stoked to see them, and they were really happy to have their photo taken. I hung out with them for about 30 minutes, waited for them to lose interest in me and go back to fishing, and then jumped in and shot a ton of different images: on the wide end, backing up, from the street, up close, using some of the other boys as foreground elements, shooting high and shooting low. The result was a super diverse set of images that all work together to tell the story of these little boys hanging out on an afternoon in Bangkok.


Any prime lens shooter can benefit from this, but especially on a 35, where just a few steps can completely change the look of an image.
7. Know where 35mm really shines
35mm is an incredibly versatile focal length, but I think there are some specific scenarios where it really shines: everyday, real-life, ordinary scenes. Because 35mm is such a natural focal length and makes you feel like you're actually there, it's amazing for street photography, documentary photography, or just documenting your life.
That's something I've started doing more and more over the years, especially since picking up the Fuji X100V, and now the Fuji X100VI. It's the camera I use to document my everyday life, and the 35mm focal length really excels at that.
A 35 isn't going to imprint any kind of dramatic effect on your image. You won't get a ton of compression or a ton of distortion. It's just an accurate depiction of real life, and I think that's why I've fallen in love with this focal length so much over the last few years. It's the focal length I'm going to use to document my life now, and in the future.

So, is a 35mm lens worth learning?
Absolutely. The more you shoot with a lens like this, the more you'll develop a relationship with it. When I first started shooting with a 35, I really struggled, because I was coming from shooting mostly with an 85. But one of my favorite photographers at the time was shooting with a 35, and I was inspired to give it a try. Ever since, it's been my favorite lens, and I've really started to see the world through a 35.
I credit a lot of my growth as a photographer to the 35mm focal length. It taught me how to see the world, it taught me how to compose my shots, and some of my favorite photos of all time were shot with it. It definitely takes some getting used to in the beginning, but these are the tips I follow every single time I go out with a 35.
Do you have a go-to tip for shooting with a 35 that I missed? Let me know in the comments on the video! And if you want to keep learning, check out my posts on how to find your photography style and how to shoot in harsh midday light.
Best of luck and happy shooting!
Do you vibe with my style? Most of the photos in this post were edited with my Film Vibes Preset Pack, the same presets I use to edit pretty much all of my images. Check out the Film Vibes Preset Pack

Get the look in one click
Film Vibes Preset Pack
30 film-style presets that give your photos a timeless touch, inspired by famous film stocks.
$34
30 presets · For Lightroom
Sean Dalton
Made with ☕ and a camera.