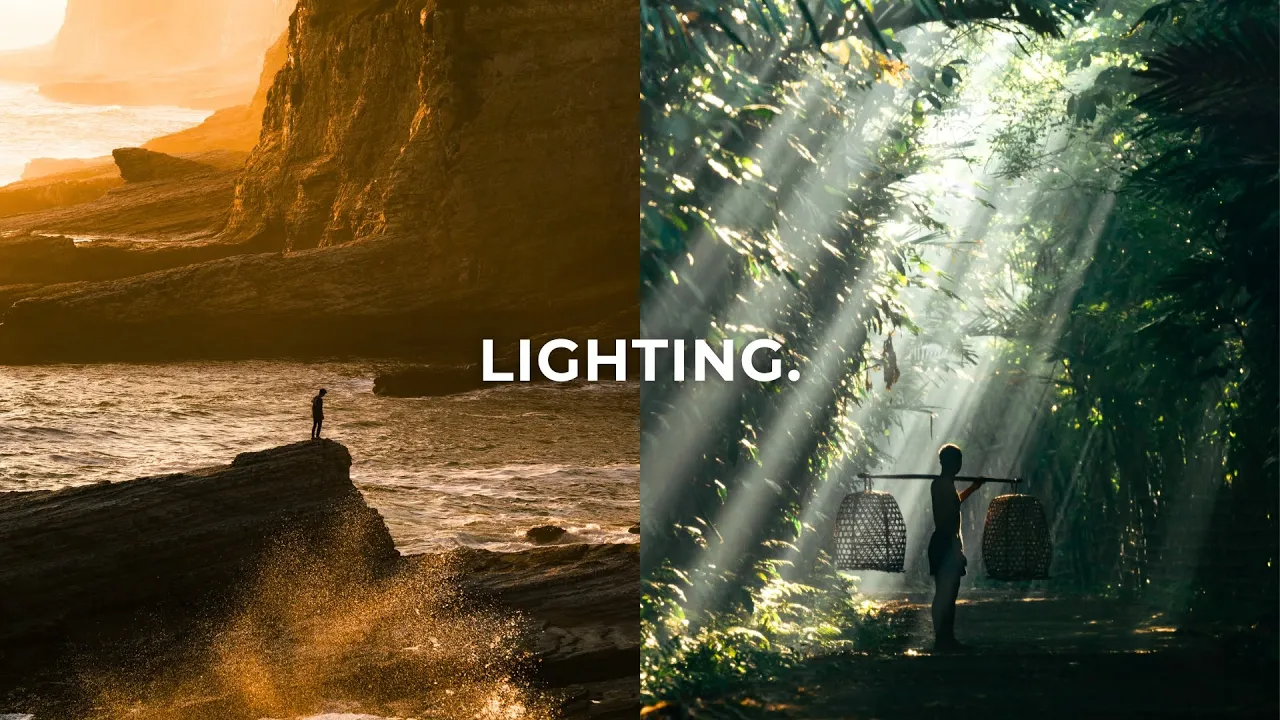
The Ultimate Guide to Lighting in Photography
Photography Basics
Lighting changes not just how your photo looks, but how it feels. Here are the three lighting concepts every photographer needs to understand, plus practical tips you can use right away.
·
13 min read

Lighting is, without a shadow of a doubt, one of the most important factors in photography. I think most of us can agree on that. But the reason isn't just how lighting affects the look of an image. More importantly, it's how lighting affects the way an image feels, and the emotions and story that image is telling.
Lighting in photography can also be a little difficult to understand. So in this guide, I'm doing a deep dive: the three lighting concepts you need to understand as a photographer, the types of natural light you'll find out in the world, and some practical lighting techniques you can start using right away. Let's go!
READ OR WATCH: This blog post is also available in video form! If you'd rather watch me explain this content, simply watch the video below. Otherwise you can find the text guide below. Just keep scrolling!
In The Ultimate Guide to Lighting in Photography, I walk through every concept in this post with my own photos.
The 3 core concepts of lighting in photography
When it comes to lighting in photography, there are three core concepts you need to understand, and they're all related to your light source: wherever you're getting your light from, whether that's the sun or a softbox. Those three concepts are the quality, the strength and the direction of the light source.
The quality of the light source. This one is exactly as it sounds. There are high-quality light sources, and some pretty crappy ones too. The best example is natural light (light from the sun) versus artificial light (any light that doesn't come from the sun).
Generally speaking, natural light is the highest quality light we have to shoot in. The sun is massive, its light can get very soft, and it has beautiful color to it. It's a very high-quality light source that's readily available.
Artificial light can also be a fantastic tool, especially when the sun isn't reliable. It lets us shape our own light and really take control of a scene. But it's much more difficult to make look natural, because you can never mimic the sun. And a lot of the artificial light around us just isn't very high quality. You'll notice this in a coffee shop with those hanging bulbs that have a really beautiful warm tint. Go to take a picture, and they start flickering. That's a low-quality light source, and it won't look good in a photograph.

If you're shooting at night, you won't have any natural light, so you're fully reliant on artificial light. That might be light you control, like a flash, or ambient light, which is just the light available in your environment that you don't have any direct control over. I love shooting at night, because you can get some really interesting and dynamic lighting, and all the principles in this guide translate directly. But for the rest of this post, I'll mainly talk about natural light, because it's hands down the highest-quality light source we have and I think it's more relevant for most photographers.

The strength of the light source. A really strong light source creates very hard light, which creates a much more contrasty scene. A weak light source creates really nice, beautiful soft light, which is a little easier for cameras to photograph.
You'll often hear the term dynamic range thrown around here. Dynamic range is the range of light your camera can capture, from the dark end to the bright end. Cameras usually capture somewhere between 13 and 15 stops of dynamic range, but the human eye can see between 21 and 24. So your camera doesn't have the same latitude you do.
That's why you'll often hear people talking badly about harsh midday light. If the light is too strong, your camera can't capture detail in both the highlights and the shadows. You'll have to pick one, and that may or may not be a good thing for your photo. The most important thing to understand is hard versus soft light, and the effect each has on the contrast in your image.

The direction of the light source. This is the one so many photographers ignore, but it arguably has the biggest impact on your photograph. It's about your orientation to the light source, and the light source's orientation to your subject. By moving the light source, or by shifting your own perspective relative to your subject, you can completely change the way a photo looks. Generally speaking, there are three main directions of light.
Front light. The light is behind you, so you're shooting with the light. Everything in your scene is nice and evenly exposed, which looks good, but you miss out on some pretty interesting shadows.
Side light. The light is to the side of you and your subject. This creates some really beautiful shadows that add a ton of depth and visual interest. I'm almost always looking to shoot with side light, because I think it makes a scene look so much more interesting.

Backlight. You're shooting into the light source, with your subject between you and the sun. This makes the shadows in your shot much deeper, darker and more dramatic. If the light source is strong enough, you'll get a silhouette, where your subject appears completely dark and is outlined against the sky. I really enjoy shooting backlit scenes too, because they add so much interest.

When you're out shooting, constantly shift your perspective (if you can) to change the direction of the light in your shot. It has massive implications for the way your photo looks and feels, so always experiment with different perspectives.
Using light modifiers
We can also manipulate light sources to make them harder or softer, or to change their direction. With artificial light, that might be a softbox. With natural light, it might be a 5-in-1 reflector set, which you can use to bounce light back onto your subject, or to diffuse light by pushing it through a white sheet so it looks much softer.
We can also use things like smoke, haze or mist to diffuse light or create atmospheric light. It's a really cool way to get light rays in your photos. There's one spot in Bali where the light spills through the palm trees and hits the incense burning in the morning, creating these gorgeous light rays. Smoke is one of the easiest ways to make a shot look 10 times more cinematic, because it adds a ton of density to the light.

It's also important to think about how light reflects. A white surface, like a white wall, will bounce light and often produce a very soft, beautiful light. A dark wall absorbs light and can be used to deepen the shadows in one part of your image. That's why you'll often see photographers using black cards or boards in the studio.
These concepts might seem a little basic, but they really are the foundation of lighting in photography, and I think about them constantly, even when I'm planning a trip, because I want to know what kind of light I'll get when I arrive.
Types of natural light
Now that we have a good understanding of the core concepts, let's talk about the different types of natural light you'll find out shooting.
Golden hour (sunrise and sunset). When you're learning photography, one of the first things you'll hear is that golden hour is hands down the best time to shoot. That's because the light is absolutely beautiful: soft, directional light that spills in from the side of your scene and creates tons of interesting shadows and depth. And because the sun is so low in the sky, the scene isn't overly contrasty, so it's easier for your camera to capture the whole range of light.
But sunrise and sunset are actually completely different times to shoot, because the sun is in a completely different part of the sky. One scene might look amazing at sunrise because it's beautifully backlit, but not very good at sunset because it's front lit. When I'm shooting landscapes, I use an app called PhotoPills to predict where the sun will be, so I know the angle of the light.

Blue hour. Blue hour is about an hour before sunrise and an hour after sunset, and it's hands down my favorite time to take photos. The light is incredibly soft, with a beautiful blue tint, and you can get some really dreamy, moody shots. It's a little dark, so you may need to open up your aperture. Often when I'm shooting at blue hour, I'm at f/1.4. But you get these beautiful shots with gorgeous color.

Midday light. Notice I'm not saying "harsh light." I don't think there's anything wrong with shooting in the middle of the day. You'll often hear that sunrise and sunset are the best times to shoot, but that's not true at all. A lot of scenes look really good in the middle of the day, depending on where you are and what time it is. At 12:00 with the sun directly overhead, you might not have any shadows at all. But wait even two hours, and the light can get really nice.
Sometimes we want to shoot in hard light anyway. I really enjoy it in cities. Take New York: when hard light spills through those tall buildings, you get some really interesting geometric lines, beautiful shadows and nice highlights, and those can act as really strong leading lines. Hard light isn't wrong. It's just a different style of photography. (Here's my full guide on how to shoot in harsh midday light.)
The one place I do think hard light is really difficult is nature. When hard light hits foliage, you get a ton of hot spots on the leaves and trees, and it just doesn't look very good. In a city, though, I think it makes compositions a lot more dynamic.

Overcast light. A lot of photographers love shooting on overcast days. When sunlight hits the clouds, it gets nice and diffused, and you get this beautiful soft, even light over everything. It's really easy to shoot in. It's not as dramatic as golden hour, but sometimes that's exactly what you want, because dramatic light can distract from your scene. It's also great for portraits, because you get a nice, even exposure across your subject's face.

Those are the four main categories of natural light. But remember that light varies massively depending on where you are in the world and the time of year. Summer in California has very warm, directional light, while winter in Japan has really soft, diffused light. You won't always know how it'll look until you go and pay attention to it. All light is beautiful. Sunrise and sunset aren't necessarily better than the middle of the day. Always ask yourself what type of light will enhance your shot and give you the look you want.
Lighting tips that will level up your photos
You can't change the light after you shoot it. You need to get it right in camera. Yes, when you edit a photo you have some creative control. You can shape the light a little with range masks and play with contrast and exposure. But you can't actually change the light in the scene. So pay very close attention to the light while you're shooting. Think deeply about its direction, look at everything in your scene, and notice how the light is bouncing around.
Shoot into the shadows. A lot of photographers walk into a scene and think about how to capture as much detail and exposure as possible, which often means shooting with the sun behind them. But shadows add so much interest. Shooting with side light or backlight gives you much more interesting shadows and so much more depth. I think it's one of the fastest ways to level up your photography.
Light can be the subject. We usually talk about using light to enhance our subject, but light can be the subject in and of itself. In really dramatic light at sunrise or sunset, the light itself can become the star of the photo, and there's absolutely nothing wrong with that. A lot of the time when I notice beautiful light, I just photograph the light. And even when it isn't the main subject, light can play a massive role in your composition, like the deep shadows and leading lines you get in strong light.

Work with the light, not against it. Sometimes the light just won't look good. It's too harsh, or it's not what you're looking for, and sometimes it really does just suck. But other times you can find a creative way to use it. Most of the time, that comes down to the direction of the light: shift your perspective and change the angle the light is coming from, and you can rescue a shot in terrible light. Or use a modifier to shape it. If you shoot portraits or products, I'd always recommend carrying a 5-in-1 reflector set.
Pay closer attention to the light around you. Even when you don't have a camera, look at the light. You'll start to notice some really gorgeous light when you're out and about, and every little mental note goes into a database you can use for photography. Every time I hang out with other photographers, we're constantly talking about the light, how harsh it is, or how beautiful and soft it is. And when you do go out to shoot, shoot in all kinds of light. The more you engage with different lighting, the deeper you'll understand it, until you can read the light in a scene and know how it'll look before you even take the picture.
I honestly think that last tip is the most important one. Lighting almost becomes instinctive, and one thing you'll find in almost every talented photographer is a deep, intricate understanding of light. That comes through time and practice, and simply paying more attention.
So, what makes good lighting in photography?
That's the core foundation of lighting in photography: the quality, strength and direction of your light source, the different types of natural light, and how to work with whatever light you're given. You can get a lot more technical than this, but honestly, I think this is all you really need to go out and excel. Being good at light is just being able to notice beautiful light and capture it in a beautiful way, and that comes through trial and error: shooting in terrible light, shooting in beautiful light, and paying attention to how both look in your images.
If you have any questions about lighting, let me know in the comments on the video. I reply to every single comment and I love chatting about this stuff. And if you want to see how light shapes the emotion in a photo, check out how to take photos that make you feel something.
Happy shooting!
Want to master light, composition and the rest of the basics? My Photography Essentials course gives you a super solid foundation in everything you need to know to take beautiful photos.


Sean Dalton
Made with ☕ and a camera.